- TOSIZE.fr
- Do it yourself
- DIY Projects
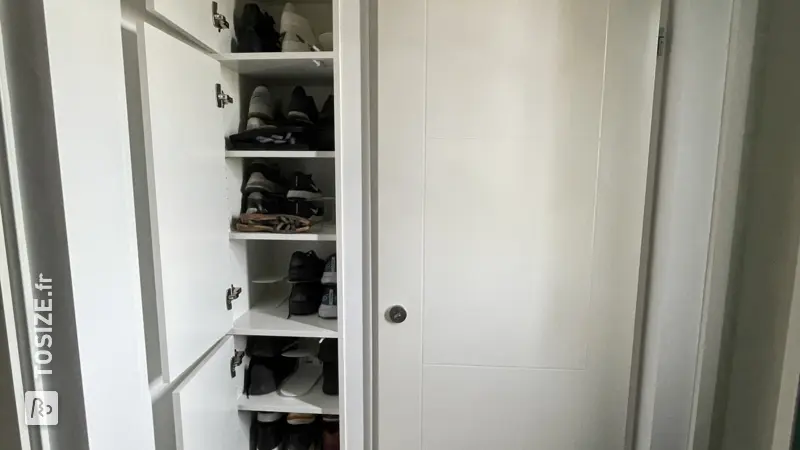
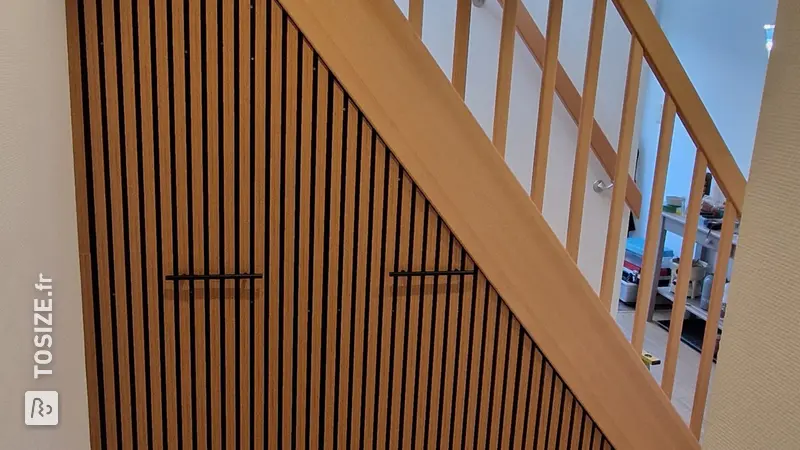
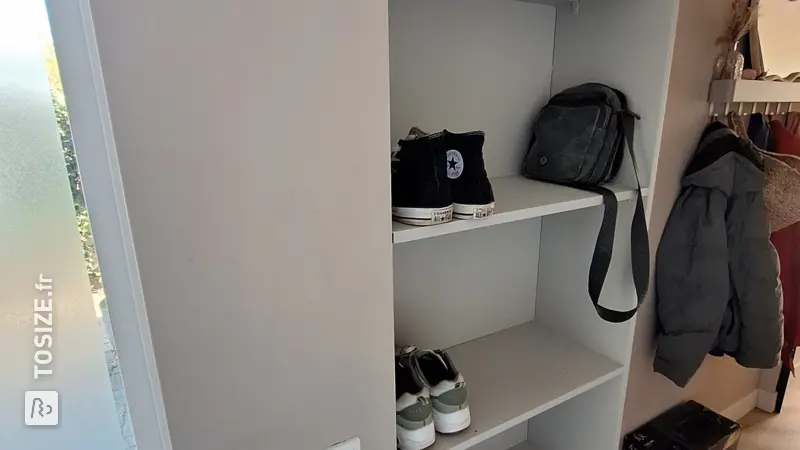
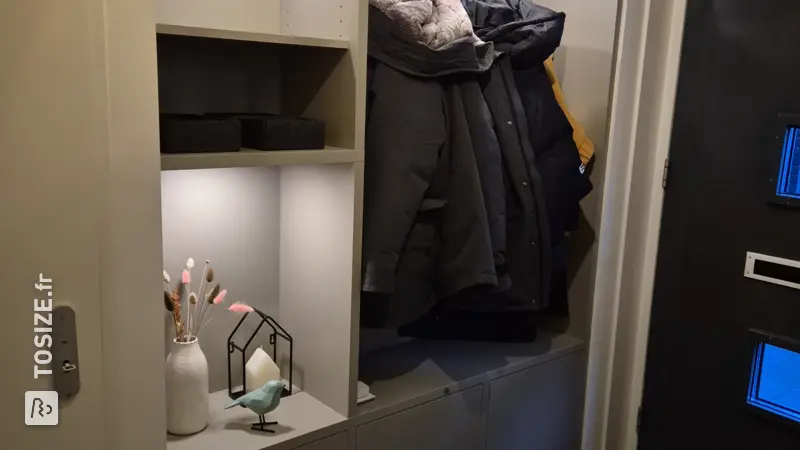
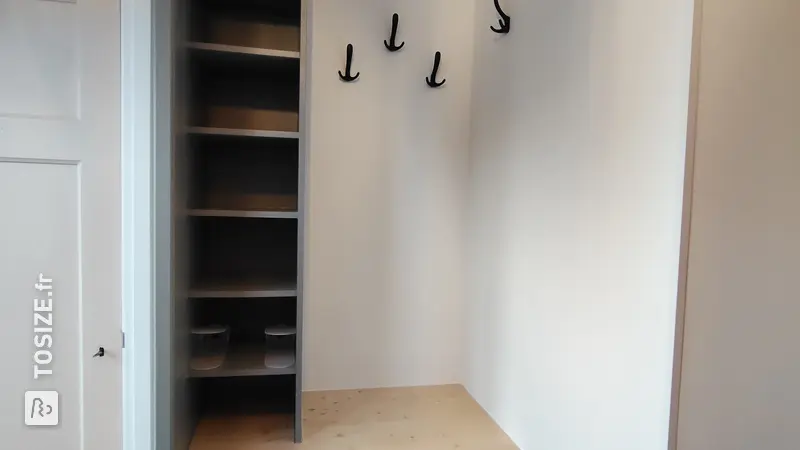
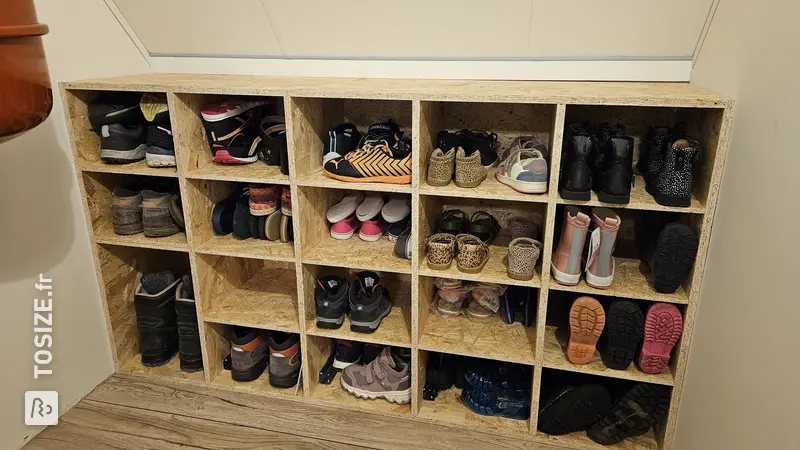
Shoe cupboard under stairs, by Jan
Shoe cupboard under stairs, by Jan
Create this project yourself with sheet material cut to size by TOSIZE.fr!
Jan
Above average
3 minutes
Description by Jan
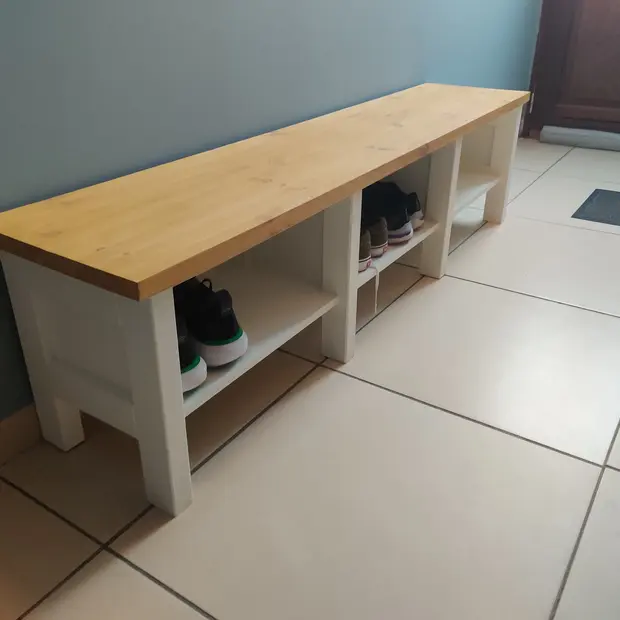
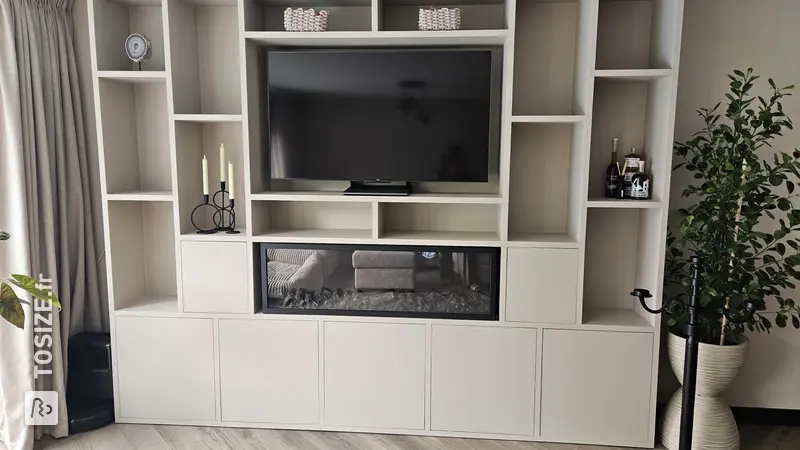
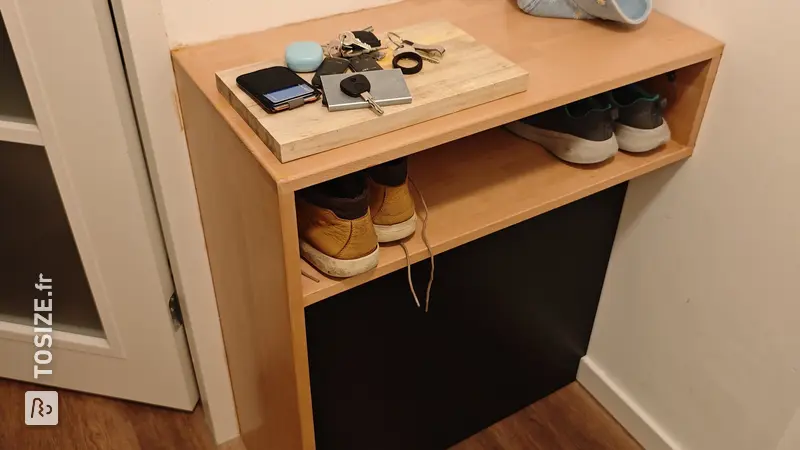
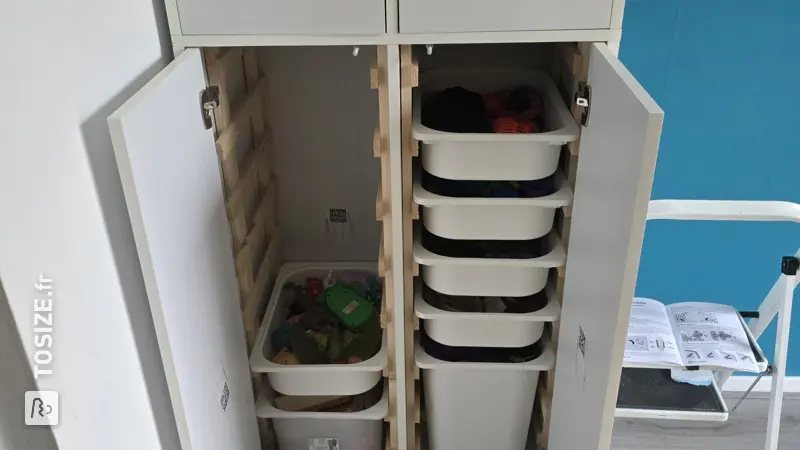
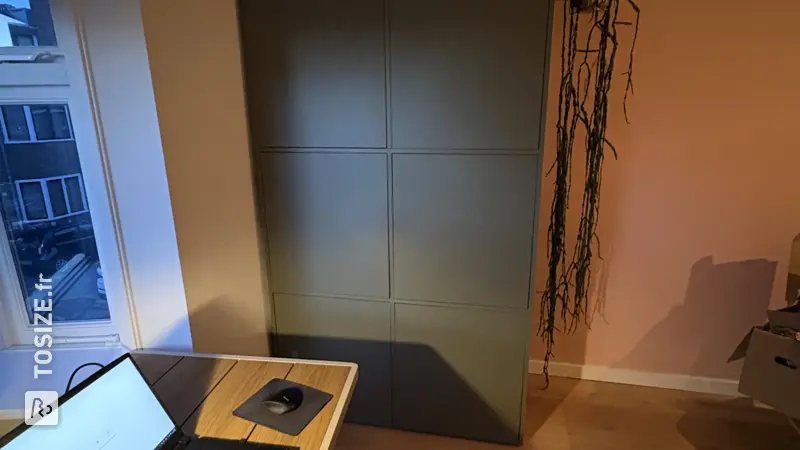
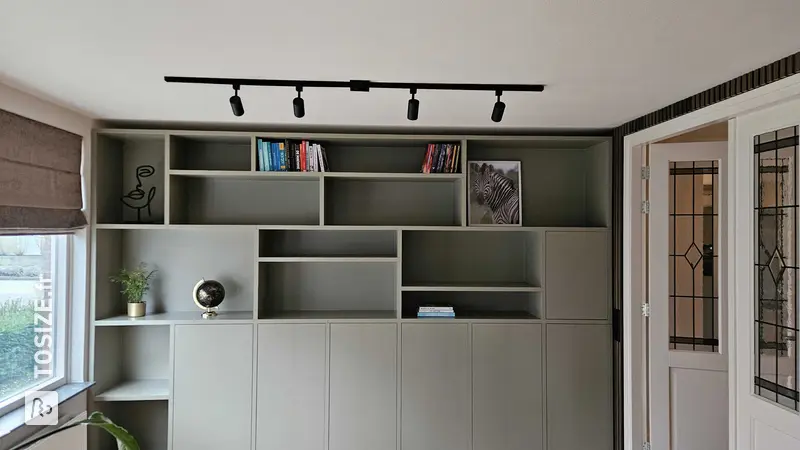
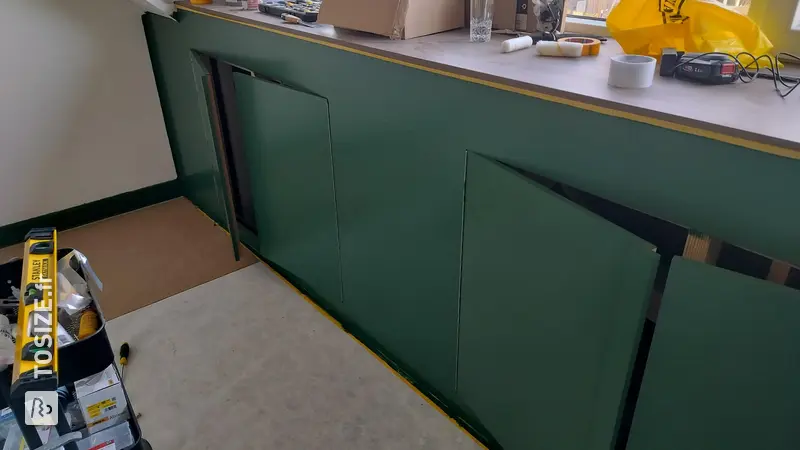
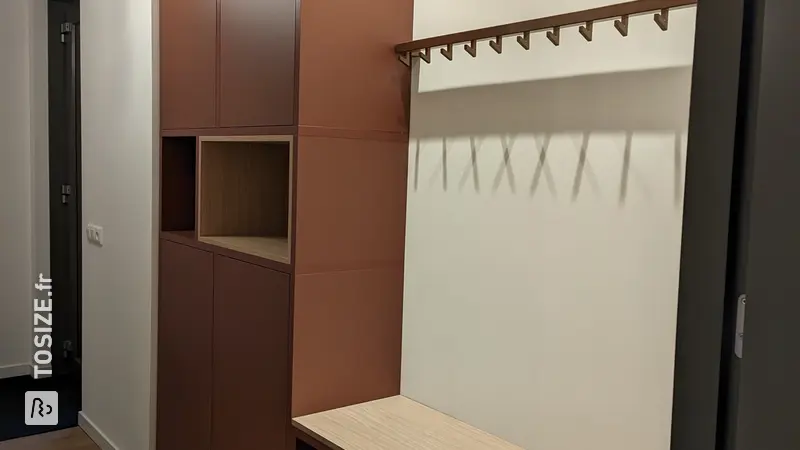
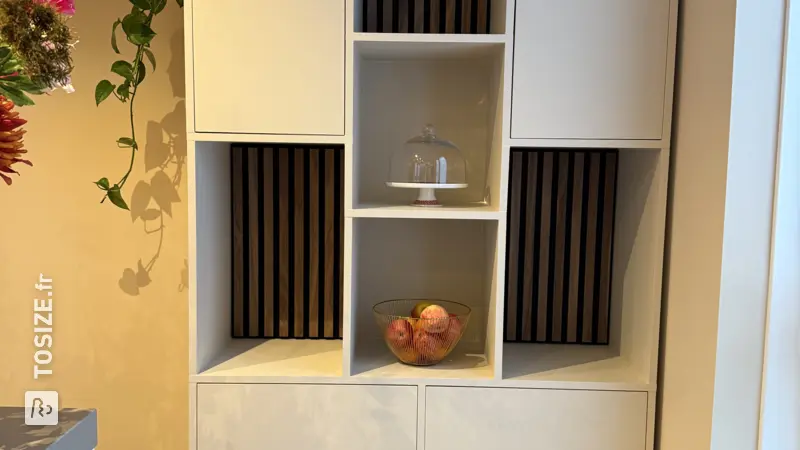
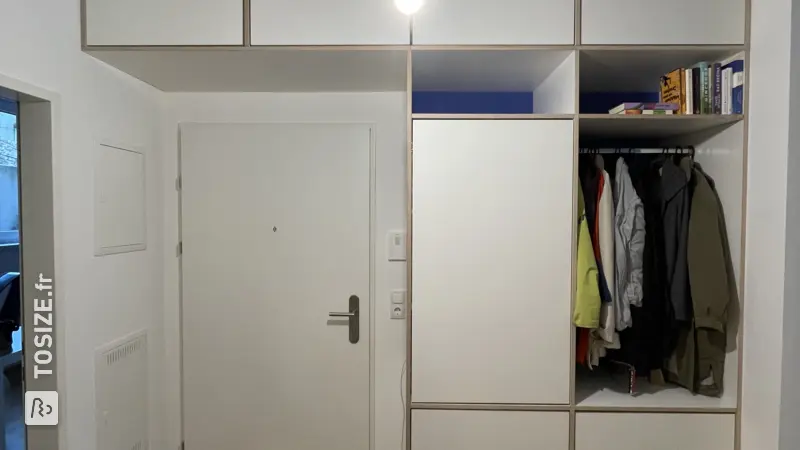
A built-in shoe cupboard under a staircase without right angles and edges. The stairs needed to be filled, and the idea was to blend the cupboard into the hall a bit, so that it doesn't really look like a separate cupboard, but more like a part of the space. I waited a long time to start it, considering so many sides were not straight. But in the end it turned out better than expected. All in all it wasn't as difficult as expected. I had to 'freestyle' a bit building, since I didn't draw everything in advance (only straight sides), but this makes it fun! Tip: If you can draw it, you can make it!
How I made this project
- Rough idea, and thinking
- Measurement
- Drawing, if you can draw it, you can make it. It comes down to figuring out how to make everything fit, how you want doors to open (and how wide, the large cabinet door opens much wider for better access), and then start measuring (size of shelves, etc.). In our case, the top shelves could not be the same size as the bottom ones, so they were shortened on one side and a section of the side wall was made diagonal. This was going to be complicated to draw, so the plates were ordered a little larger and sawn to size on site (with bevel, etc.), you can do it 'freestyle' to call. The base plate of the small cupboard under the stairs (is just a hollow space, with a base plate) also does not have any right angles, so it was also ordered larger. Everything is sketched on paper and then drawn in a program (plenty available online, I used Sketchlist 3D, trial version).
- Measure everything to order. See above, the base is drawn, so I had all the dimensions of that. What could not be drawn exactly, I measured and ordered something larger, so that everything could be cut to size. Steps are filled from the back with beech wood (ordered separately and sawn on site as each step had a different size and was not straight). Since the drawing program was a trial version, I can no longer use the drawings unfortunately!
- Building. Which could be made without making adjustments first. Make a base and start measuring. Cut everything, measure again, assemble, fit, install.
- Finishing. Side wall measured too short (plinth not included!), so had to come up with a solution. Instead of a whole new plate, a piece of surplus was attached to the actual plate with glue and dowels, and finished with epoxy filler. Completely invisible after painting.
Dimensions of my DIY project
Cabinet can be made in all sizes, depending on the available space.
Tip! Also check out our handy DIY tips!
What now?
Want to make this DIY project? Check out Jan's saw list and complete your order easily.
1 150,78 €
All materials used
View all sheet materials